Saturday, November 28, 2015

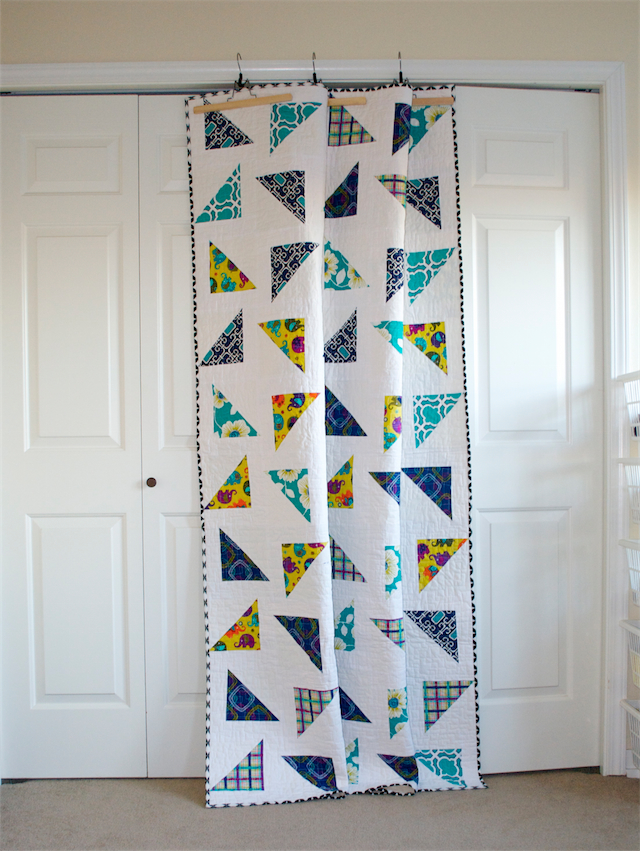
Falling Triangles Quilt - II

With the blues and greens I made a second falling triangles quilt. This one will go to the sibling of the recipient of the pink one in my previous post. He is too small to appreciate the quilt but I am sure his mom will. :)


For the back I used left over scraps from various quilts I have made. I have been really living up #sewmystash2015. 


I quilted it with a square meander for a more masculine look. I think sharp edged quilting goes better with quilts for boys. Maybe I am gender biased. :)


Binding is an orange peel Alexander Henry fabric I bought a while back and never found a good use for it till now. 


That is the last of the five WIPs I finished in the month of November. Words cannot describe how relieved I am to have a fewer boxes of unfinished projects laying around. If I can finish a few more, I might actually be able to think in my sewing space once again. The biggest holiday gift to myself this year would be a clutter free sewing room....till I am back to square one a year later! 

Linking up to: Fabric Tuesday


Saturday, November 21, 2015

Falling Triangles Quilt - I

Earlier this year I won a bundle of novelty print fat quarters from The Electric Quilt Company. When it arrived, I realized that the fabrics are not what I would normally use but work well for a kid. Around the same time I had seen this tutorial by Missouri Quilt Company called the 'Falling Triangles Quilt'. Seemed easy enough.

I divided the fabric into blues and pinks and had enough to make two quilts. First up the pink quilt.


I am loving Abby as a prop for these pics. She keeps it interesting!
For the back once again I hit up my stash. It never disappoints. I am glad I am finally putting all my fabric to use.


I quilted it using a simple meander. When I look back at the pictures of my first quilt with meander quilting I realized how much I have improved. It has definitely become one of my go to FMQ patterns. Quick and gives an amazing texture to the quilt.


The binding is left over fabric from one of my early quilts too.


I already have a little girl in mind for this quilt and she is going to be one happy kid this Christmas.


Sunday, November 15, 2015

Supernova Friendship Quilt

Last year I had participated in the Supernova Friendship Swap hosted by Stephanie of Late Night Quilter with Heather from Quilts in the Queue.

We first started by picking out a color palette and narrowing down the fabric choices. Both of us decided to only use fabric from our stash. 10 months later both of us had 9 blocks for the front and 1 for the back. Then came the hard part. I could not decide which block to use on the back. I loved all the blocks. Also I envisioned myself curled up on the couch under this quilt and it wasn't long enough to cover my toes. So I just had to make two more blocks to make it a little longer.

Once I put the quilt top together I just loved how it looked. Such a refreshing color palette. I added a 5 inch border around the quilt just to make it large enough to cover me. I like my toes warm. :)


I tried Dogwood quilting pattern by Elizabeth Hartman for the first time and like the texture it gives the quilt. I used the pieced blocks as a guideline for the quilting. So no marking required. A win-win.


I quilted straight lines on the border and used up the remaining fabric for a scrappy binding. I have become comfortable with machine binding and now I can use a 2 and 1/4 inch strip instead of a 2 and 1/2 inch strip. So much better.


For the back I mainly used Sprinkles fabric from Dear Stella Piper collection. The colors matched the front. In addition I had to add some Alexander Henry and Denyse Schmidt fabrics to complete the quilt back.


I was hoping to get outside for some good pictures, but it has been fairly rainy in Seattle lately and had to settle for the bright indoors. :(


It also got the quilt inspectors stamp of approval! 


I think this is one of my favorite color palettes and may perhaps look into making another quilt in the same colors someday. One more WIP done and I am so happy that this one will be reminding me of a quilty friend every time I use it.


Monday, November 9, 2015

Hashtag Quilt Tutorial

Ironically I even had a half written post with the Hashtag quilt tutorial from way back. I decided to spruce it up and publish it nevertheless. 

There are a ton of tutorials out there on how to make a Hashtag block, but the focus of this one is specifically on how to assembly line the process. You can sew similar seams in one batch, iron and return for the next batch of seams. If you are a confident beginner, you can literally skip the ironing and just finger press the seams as needed.

Each hashtag block is made from 2.5" strips. You can even use a jelly roll.

Step 1: Cut 2.5" strips from the printed and background fabric


Step 2: Strip piece the fabrics in an alternating manner as shown below.


Step 3: Cut 2.5" vertical strips. (I stopped to iron the seams before this step.)


Step 4: Strip piece the printed fabric to these sections.


 Step 5: Repeat the same for the other side of the printed fabric. You have to be careful to align the horizontal pieces so that they form a straight line. I eyeballed this by laying the pieces so they are aligned as shown in red and then pinned the seam.


Step 6: Add one more strip of the printed fabric to each block. Again you have to carefully align the horizontal pieces to form a straight line. You will get better at this once you have sewn a few blocks.


Step 7:  Done and on to ironing.


Within no time I had a bunch of blocks done.


Once you have determined the layout even piecing the top together is breeze. All it requires is chain piecing the blocks to sashing. I used 2.5" strips as sashing.


Friday, November 6, 2015

Hashtag Quilt - II

This is the second of my recent WIP finishes. Another Hashtag quilt. It goes together really quickly and makes for a great gift. All the blocks can be chain pieced and the time consuming activity boils down to ironing the seams.


For the back I used an argyle print that I had bought almost 4 years ago and had not found a good use for it. Again stash for the win.


Which brings us to binding. Along with the salmon stripe I had this mint stripe that matched these set of blocks. Something tells me I might have got the striped fabric to bind these quilts but somehow I just don't recall making the purchase. Oh well, all is well that ends well.


The quilting merely echoes the block seams and the walking foot on the Bernina does an awesome job. I think it is my favorite foot for the machine.


Sunday, November 1, 2015

Hashtag quilt - I

Lately I have been trying to see if I can finish up some WIPs in the interest of reducing the clutter in my sewing room. Some of these WIPs are over two years old. These quilts were started around the same time as the Greek Cross quilt when I was on a quick and easy quilt making spree. However after some initial piecing only the Greek Cross quilt really kept my interest and the rest fell wayside. I picked the quilts up again and decided to finish them. 

All of these quilts are extremely quick to put together and can be chain pieced
followed by a ton of ironing. I must have used 10+ yards of Kona white in the process. A color I rarely use nowadays. One thing I noticed about quilts with a stark white background is that they photograph really well.

First up the little hashtag quilt. I was sweating the binding fabric, but lesson learnt "never underestimate your stash". Upon searching I found a candy stripe fabric in salmon that matched perfectly with the rest of the fabric. I can't recall ever buying this fabric but it's Clown Stripe in Coral from Michael Miller. I was glad I stashed when I did as it is an odd shade that would have been difficult to source at this time.


I had a few left over blocks that I put together for the back. A bit too bright for my current taste but I think it would make an adorable quilt for a baby girl. For quilting I echoed the block seams on the front and it gives a nice texture to the quilt.